


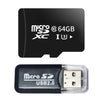


Working card that was free, now acting as a dump card for my phone. Speed is unrelevanr
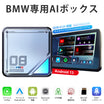
Totally uninterested in TPMS and Dashcam. If the GPS had been into the Plain version I had choosen that alternative and given it 5 stars. So the plain version, doing its job, easy install and setup and pricerange totally fine.
Remarkable is the slot for flashcards, haven't found any way to access it in the settings and menu.
der Bildschirm passt perfekt in die BMW-Halterung, ist schnell eingerichtet und hat ein sehr scharfes und gut ablesbares Bild. Die Funktionen mit dem „WonderWheel“ sind einfach und sehr praktisch. Toll umgesetzt.
取説は日本語表記がなくわかりにくいですがカスタマーは迅速丁寧にメールにて対応いただけます。
お世話になっております。
ご連絡いただきありがとうございます。
日本語版のオンライン取扱説明書をご用意しておりますので、下記リンクよりご確認いただけます。
https://cdn.shopify.com/s/files/1/0562/1134/1421/files/GT8D.pdf
ご使用方法についてご不明な点がございましたら、いつでもお気軽にお問い合わせください。
今後ともよろしくお願いいたします。
Linkifunサポートチーム
Works very well so far. Really just Plug and Play if you Connect your phone before. Delivery was exakly the time they Said it would take - so all Fine there as well.
The Navi is very good.
Hello! Everything is great, the navigation works very well and we are happy with it. The screen quality is good, everything runs smoothly, and overall it’s a very nice product. We really like it.
We only have one question: how can we set up the TPMS tire pressure sensors? Could you please send us instructions or a guide on how to connect and configure them?
Thank you!
Dear Daryna,
Thank you so much for your kind feedback!
We are very happy to hear that the navigation works well, the screen quality is good, and that you are satisfied with the product overall.
Regarding the TPMS tire pressure sensors, the pairing method is the same for our compatible motorcycle screen products. You can refer to our MT23 TPMS pairing guide here:
https://www.linkifun.com/pages/how-to-pair-tpms-sensors-on-the-linkifun-mt23-motorcycle-screen
Please follow the steps in the guide to connect and configure the TPMS sensors.
If you still have any problems during setup, please feel free to contact our after-sales support team at support@linkifun.com, and we will help you check it further.
Thank you again for your support!
Best regards,
Linkifun Support Team